
The Brief
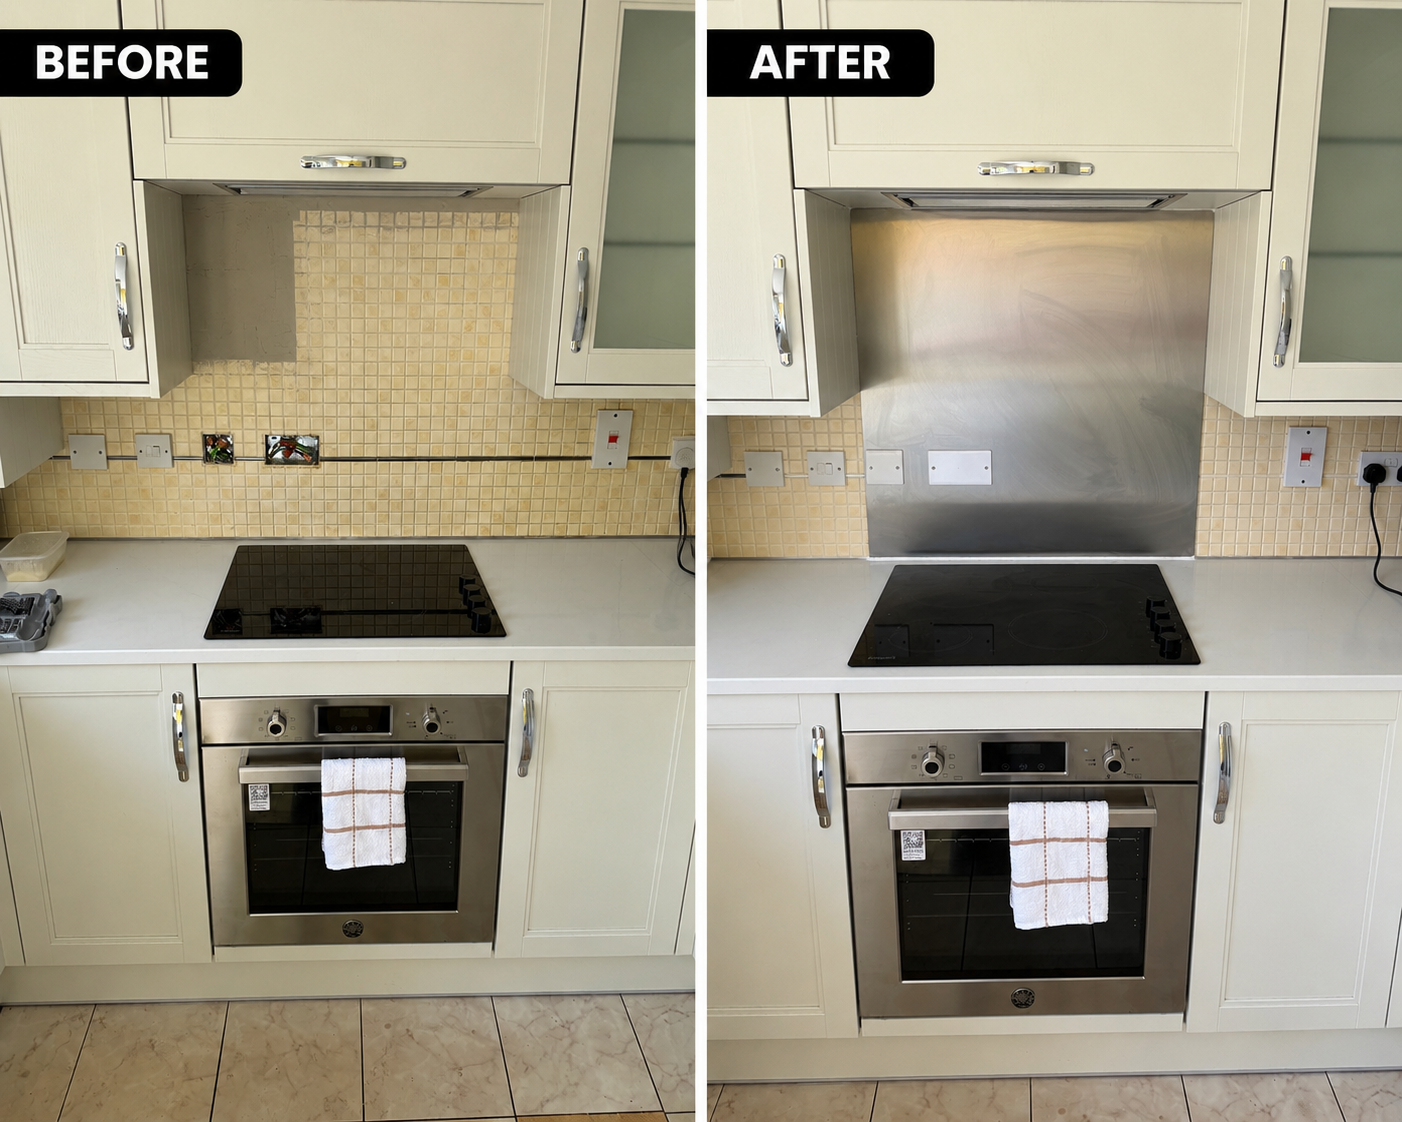
The landlord wanted to refresh the kitchen in a rental property between tenancies. The existing tiled splashback was cracked, stained and difficult to keep clean, and the landlord wanted a more durable, modern replacement.
Initial Condition
The existing ceramic tile splashback had several cracked tiles and heavily stained grout lines that were no longer responding to cleaning. The overall kitchen appearance was dated, and the cracked tiles presented a hygiene concern for the incoming tenancy.
Issues Identified
- Cracked ceramic tiles creating an unhygienic gap in the splashback
- Grout lines heavily stained and discoloured, not responding to cleaning
- Dated overall kitchen appearance making the property harder to let
- Tile removal required care to limit damage to the wall surface behind
Our Approach
We removed the existing tiled splashback carefully, prepared the wall surface and installed a stainless steel splashback panel — a modern, seamless, hygienic finish that requires no grout maintenance and is considerably more durable in a rental setting.
Work Completed
Existing tiles were removed carefully to minimise damage to the wall. The exposed wall surface was assessed, cleaned and made good where required. The stainless steel splashback panel was measured, cut to the required dimensions and fitted flush using appropriate adhesive. All edges and surrounds including sockets were silicone sealed on completion.
How We Did It
- 1Careful removal of existing ceramic tiles to limit wall surface damage
- 2Assessment and preparation of the exposed wall surface
- 3Minor filling or levelling where the wall required it
- 4Precise measurement of the splashback area
- 5Cutting of the stainless steel panel to the required dimensions
- 6Application of panel adhesive and fitting of the splashback flush to the wall
- 7Silicone sealing of all edges and around power sockets
- 8Final clean of the panel face and surrounding work area
Materials Used
Stainless steel splashback panel; panel adhesive; silicone sealant.
Outcome
The new stainless steel splashback was installed cleanly and the kitchen presented a significantly more modern appearance. The panel was easy to wipe clean and required no grout maintenance. The landlord was satisfied with the improvement and noted it would make the property easier to market.